Most people trying mini-quads get hooked pretty easily. Racing and proximity flying gets your adrenaline pumping and encourages social flying. Personally I’ve had a couple of interesting experiences with friends…
If you observe the dates of my posts here, you’ll see that there’s gap where I was using more time to fly and get better. A few weeks ago I had a mishap that was actually quite funny.
That kind of serves as the context of this post.
At the time of the second video I had been having severe range issues with my FrSky Receiver – and by the way, this is the store where you want to buy your FrSky gear. The crash above involved a control and video glitch. In the end I resolved all the issues and now enjoy rock-solid performance, but along the way I decided to make a few changes to my ZMR-250 frame that I’m going to share on this post.
Shielding your Receiver
In the end, my range issues were caused by interference from my video transmitter. To be fair, my mini quad was really cramped before: OSD, current filter, wiring, video transmitter, 5V USB feed for my Mobius, tilted flight camera…
There are two ways to cope with RF interference: Distance and shielding. For the first, I would need to tidy up my payloads – that’s why I got a decent PDB and a better integrated OSD. But why stop there?
I wrapped the tiny FrSky D4R with a single layer of Foil Tape over the cardboard cover of the receiver. This is the metallic tape that is used for air conditioning installations and it’s nice for this type of shielding because it’s relatively light, self adhesive and cheap. I then applied some transparent heat shrinking and cut a window to access the binding button and the status led.
Shielded FrSky D4R-II Receiver
This proved to be a very simple and practical mod that made my RSSI increase around 15%. You can see it in the picture above. I was toying with the idea of connecting this shielding to ground to further improve its RF isolation properties, but this turned out to be unnecessary. Still I might do this in a later rebuild.
PDB: Meet the Diatone Board
PDBs are an easy way to tidy up your 250. The space is tight and these boards really help reducing clutter and keeping things where they are. If you have a ZMR-250 and have been looking for decent PDBs, you know how frustrating that is.
I found the Diatone PDB, a very nice and inexpensive PDB. It comes complete with LED strips (that you can’t use as is, because of its weird placement) and decent 5V and 12V rails to power your various onboard electronics.
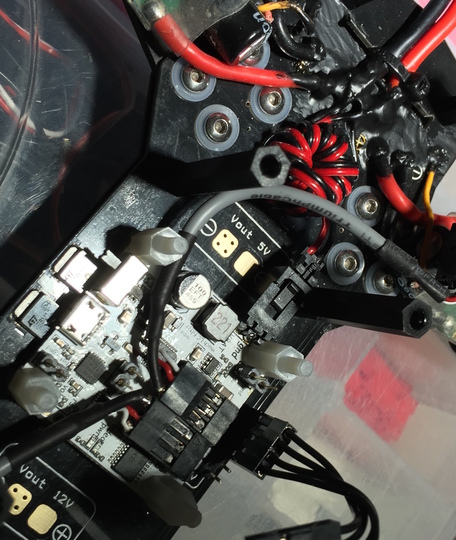
ESC Mounted to the PDB, minimal wires
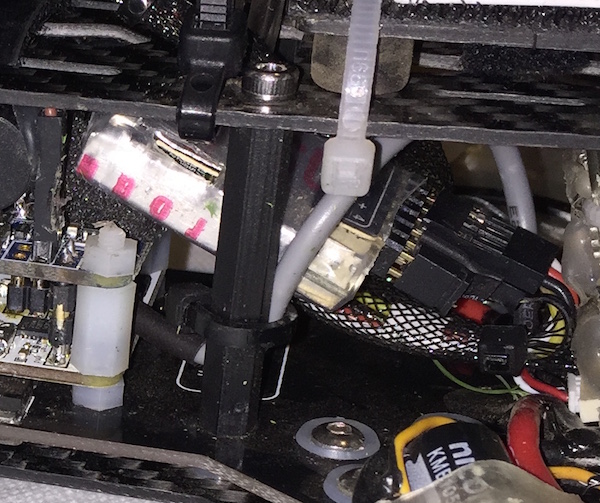
To err on the side of safety, I added nylon washers at the leg screws – shown in the picture above – and replaced the red vertical 42mm spacers with black nylon ones. Basically there’s no steel or aluminum in contact with either side of the PDB. I also used some liquid tape to reduce chances of a nasty short with the exposed solder joints.
For good measure I also added a ferrite coil in the power feed to the OSDoge to help with power filtering. The coil was fixed with hot glue to an open area of the PDB and is a nice complement to the onboard filtering provided by the OSDoge board, discussed further down. Notice the use of a notched and polarized power connector for reliability.
The PDB allowed me to reduce the ESC wiring a bit. Notice how I removed the red and black leads coming out of my ESCs, as I don’t like using their BECs. I also added a small dab of liquid tape to prevent shorts there. The PDB also includes signal traces that join each ESC control lead to a 4 pin header by your flight controller – you need to solder the header pins.
Speaking of poorly placed LEDs, I mounted my LED strips in the vertical spacers using a bit of transparent heat shrinking and some ingenuity with my soldering iron. I like the result very much.
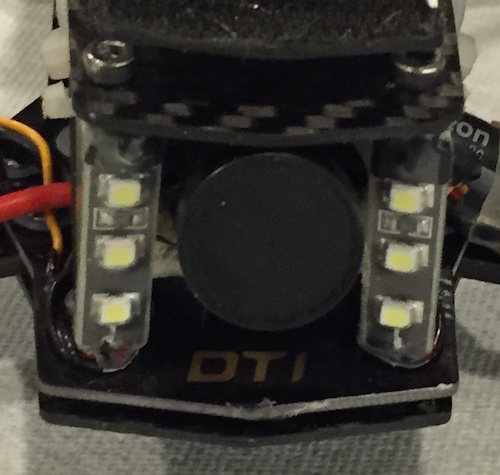
Vertical LEDs in a ZMR frame
OSDoge – The Naze32 best friend
I’m a big fan of OSDs. They provide a lot of information right in your goggles and help alleviate the stress of running out of battery unexpectedly. Having a sight on the screen also makes easier for you to maintain an efficient flight trajectory during straight runs.
OSDoge is a very enhanced clone of the venerable MinimOSD in a form factor that is Naze32-friendly and that includes filtering power outputs and other goodies to make your life easier.
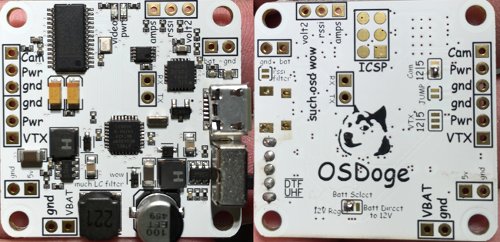
Meet the OSDoge
It’s designed to mount as a stack with your Naze32 using pins to provide power and serial communications between the OSDoge and the Naze32. It works with Acro as well as full versions of the Naze32 since their physical layout is identical. It also has a very clever switch to disconnect the USB port from the serial port used for normal operation, so that you can quickly hook up your computer via USB for quick adjustments.
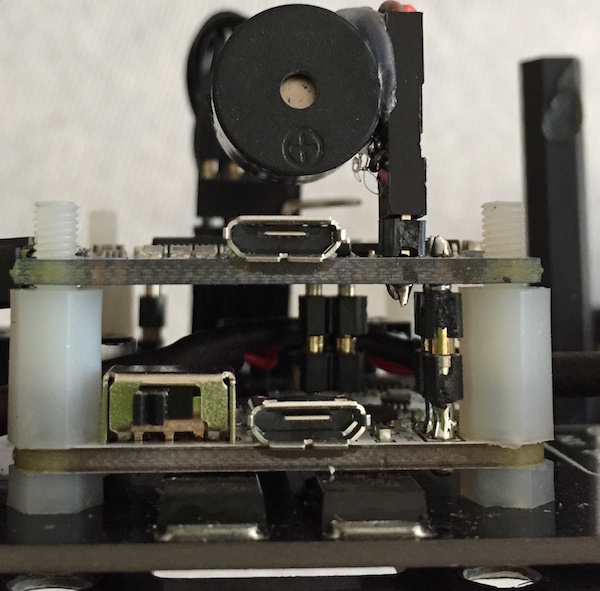
Naze32 and OSDoge in Stack
As can be seen in the picture above, I mounted both boards with the USB port facing right – this requires adjusting your Yaw in the configurator to -90. This allows me very simple access to the USB ports while in the field, without taking out any components. This is useful for blackbox functions. Note the 5V beeper mounted on top.
For quick adjustment of PIDs, the OSD software includes the ability to make changes using just your radio, which is even more convenient.
As it is, the OSD now takes care of powering up all my electronics and also displays all the telemetry I might want.
When setting up your OSDoge, the manual offers the choice of sending 12V straight from the battery or via an onboard regulator. Normally when you fly with 3S, you can simply feed the battery to your 12V rail straight, however I found that using OSDoge’s onboard 12V regulator resulted in cleaner video, probably due to the filtering.