Properly mounting a video camera in your drone might not be as easy as it seems. This is why I designed a very simple 3D-printed, adjustable mount that will fit your Mobius, RunCam HD or Foxeer Legend 1 action camera to your quad for a reliable, jello free experience.
The following models are available, depending on which frame you’re using:
- ZMR-250 V1 and V2
- Vortex 285 and Vortex 250 by ImmersionRC, replaces the built in carbon fiber plate with a light, flexible base mount. Not compatible with other sizes.
- E-Max 280 Nighthawk
- E-Max 250 Nighthawk
If your frame is not listed above, there’s a Universal Adapter that allows attaching the ZMR-250 mount to any air frame. You just need to use a small square of 3M double-sided adhesive tape for stability and a couple of zip ties to attach the adapter to the air frame. Then you use 4 anti-vibration rubber balls to attach the ZMR-250 base.
About this Mount
My Dynamic FPV Mount is lightweight – it’s way lighter than the camera it holds and in some cases, even lighter than the “official” mounts! It’s also easily field adjustable without having to replace parts or inserts – just set the upper plate to your desired angle and you’re ready to go.
Although the base is designed to break on strong impacts to help protect your HD camera, it’s though enough for the regular crashes we all experience from time to time. The video below shows what I put the prototype through during a not-so-normal flight day.
Note that I run tie wraps through the rubber vibraton dampeners to force the camera plates to stay with the frame. This will expose the mount and your camera to stronger forces when crashing, but saves time when recovering from a crash because you don’t need to reattach the mount to your quad.
Description of the Mounts – What you get
The mount is a two piece articulated design. The picture above shows two sets of mounts printed in red and black, just two of the many choices of colors available. These are the ZMR-250 model. The upper part is common to all mounts and you can even order spares if you need them.
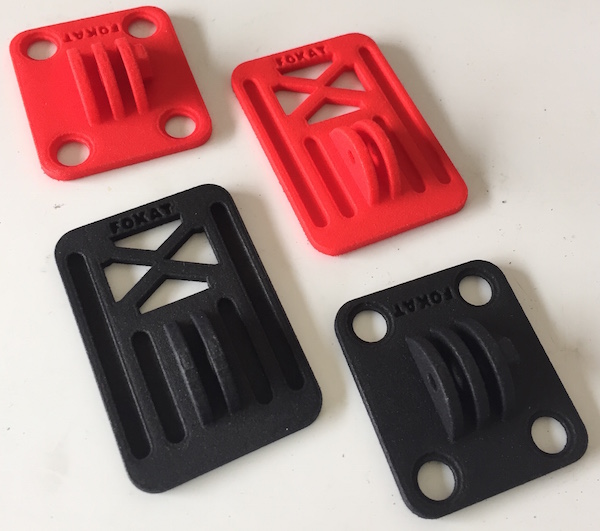
Custom FPV Mounts as Delivered from Shapeways
The pieces are put together with a single M3 screw and matching nut. The bottom plate has an embedded hexagonal nut pocket for ease of assembling and adjustment in the field.
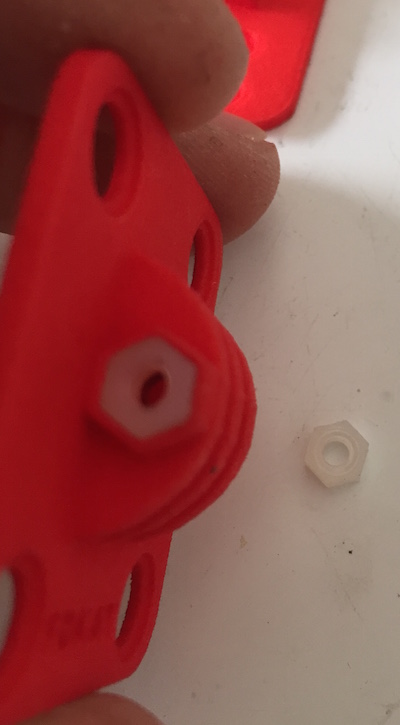
Bottom plate nut placement
I strongly recommend you go with nylon screws and nuts, as this helps with impact absorption. In the pictures below you can see a fully assembled mount. Note the material texture.
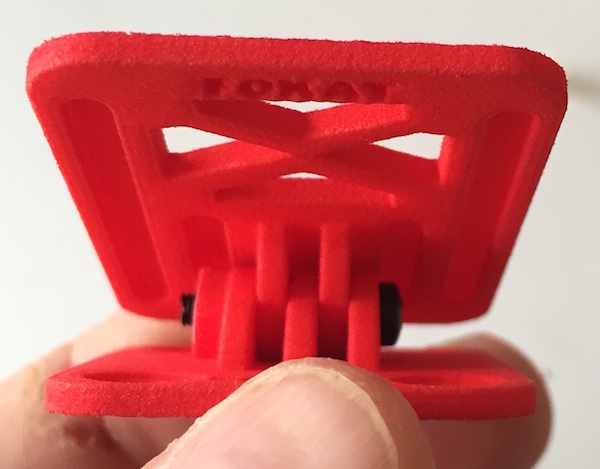
Assembled Base, Front
You might need to use a steel screw to clear the mounting holes making it easy to insert the nylon screw.
Assembled Base, Side
I prefer to fully assemble the mount before attaching it to the frame with the rubber balls but it’s also possible to do this part first – which will make slightly easier to put the rubber dampers through the plate mounting holes – and then add the top section of the mount.
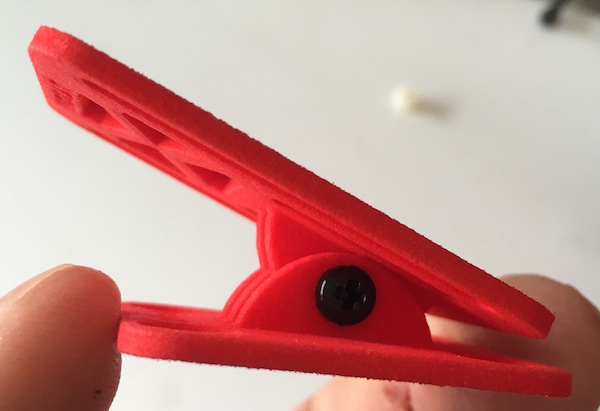
I use velcro on the underside of my HD cameras to help securing them to the mounting plates. With my Dynamic FPV Base I’ve kept this tradition.
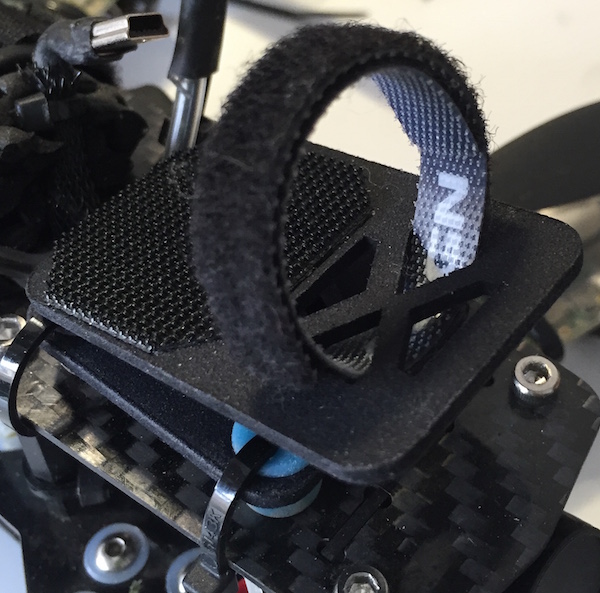
Complete Mount, with Velcro Straps
Notice the small patch of velcro in the back of the top plate, as well as the velcro straps that use the anchors in the center of the plate to hold the camera in place. The tie wraps running through the rubber balls help with keeping the base together with the quad even during crashes. This exposes your camera and the Dynamic FPV Mount to more G forces during a crash, so it increases your risk of breaking something. Still, this is how I fly!